To make true colloidal silver you will need to obtain either distilled, reverse osmosis or deionised waters. These have 0ppm impurities (perhaps 1 or 2 ppm but that’s ok). I use deionised water from the local motor shop or from Tesco’s. It’s cheaper at Tescos, costing only £1.10 for 2.5 litres. PPM refers to ‘parts per million’.
Pickling the container by making a quick batch of silver chloride.
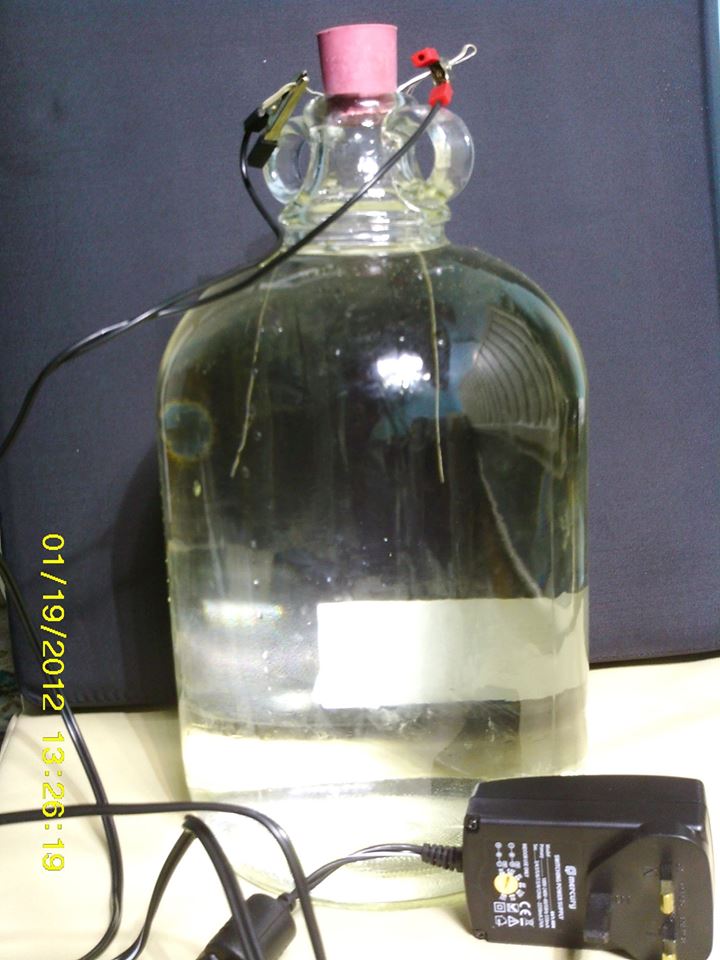
‘Pickle’ the glass jar that you intend to make the colloidal silver in. I use a 5 litre beer making glass jar (why make only a pint when it takes about the same amount of time to make a gallon?). Pickling means making a quick batch of silver water inside the vessel before making the colloidal silver proper. For reasons I’m not currently sure of, some glass jars will not make colloidal silver with pure water until they have been ‘pickled’ first. Mix a few grains of sea/rock salt with water in a table spoon and then pour the saline solution into the vessel of water. This will greatly speed up the process (salt is an electrolyte that will increase conductivity of the electricity). You will soon see ‘clouds’ of silver appearing from the positive silver rod. You are seeing silver chloride being made, which has been scientifically proven in US government studies to have many health/healing/disinfectant properties. Once the water is cloudy, switch off the power, remove the rods and give it a stir/shake. The water will now be a cloudy colour. The speed at which the process occurs depends on how warm the water is (the warmer the quicker the process) and how much salt is in the water. Generally it should only take from between 5-20 minutes to make a suitable silver chloride solution.
This silver chloride can be bottled and kept for topical or internal use, however it is not true ‘colloidal’ silver. Some people say that it’s dangerous to drink silver chloride however I drank it for about 10 years and never had any problems at all (in fact it may even be more effective than colloidal silver). Nobody contests the safety and effectiveness of using silver chloride topically, so if you are in doubt, keep it for topical or household use. Your vessel is now ready for true colloidal silver making.
The process.
Fill the vessel with pure water and attach the silver rods by clipping them to the side of the jar or by using a plastic rod holder.
Take approximately 50ml of silver chloride and pour it between the two rods. This silver chloride will act as a ‘starter’ to help with conductivity. Pure water (0ppm) is not conductive, so it helps to add some electrolyte. Switch the generator on (or connect to the batteries).
As I said earlier, temperature plays a big role in how quickly the solution can be made. Some people even microwave the water in a pyrex jar before starting the process. Others leave the jar on a heating tray or in a saucepan of simmering water.
During the winter, in a cool house, the process of making 10ppm colloidal silver can take up to 8 hours but a warm house it can take only an hour or two. With microwaved water much less time. You’ll learn about how long it takes but switching the generator off and measuring the PPM with your TDS meter (don’t put it in the water until the power is switched off as it will interfere with the reading).
Once your solution is at a suitable strength (8-12ppm is a good guideline), switch off the machine, clean the wires and stir/shake the solution. Your colloidal silver is ready to be bottled.
Bear in mind that your colloidal silver may lose a few ppm over the weeks and months, so I generally make mine at 12ppm. Evidence seems to suggest that 5ppm colloidal silver is just as effective as 20ppm or higher.
The colloidal silver will turn a yellow colour if it is exposed to light and is over around 10ppm. You may wish to cover the vessel in a paper bag or something similar to block light getting to it but it’s not absolutely necessary. Avoid direct contact with bright light though.
By James Cooper for the Simple Truths Foundation.
Click here to purchase the STF Complete Colloidal Silver Generator kit.
Click here to learn how to put a simple colloidal silver generator together.
Click here to see the shopping list of components.
Click here to see all the posts regarding colloidal silver on this blog.
Click here for the Colloidal Silver Success Stories Facebook group.
Leave a Reply
You must be logged in to post a comment.